

Overview
We’re excited to introduce our new Employee Onboarding fully integrated into our payroll platform. This new feature simplifies the process, reduces setup time, and ensures a smooth onboarding experience for both employer and employee.
QUICK GUIDE
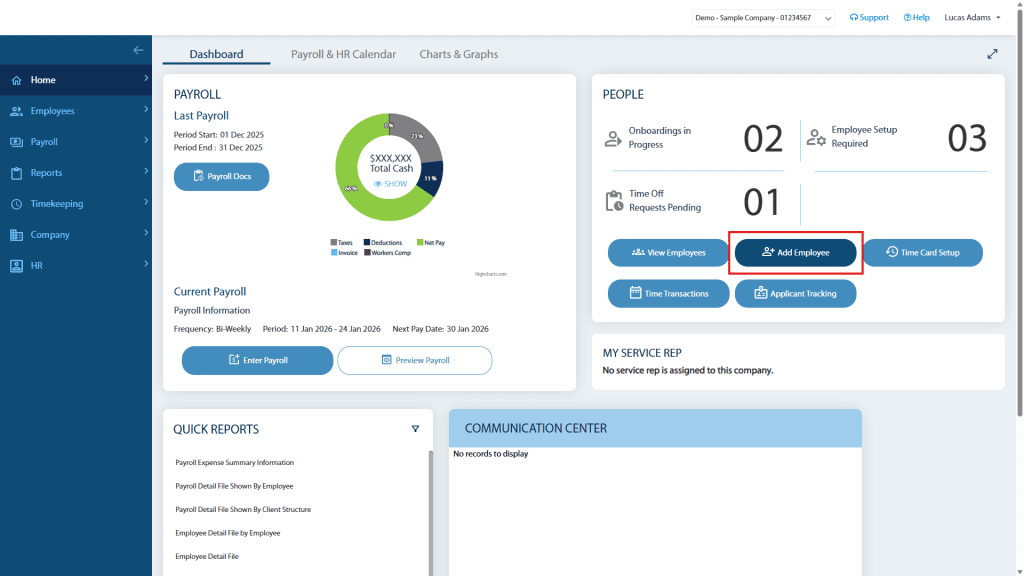
- Add Employee – From your Employer Dashboard, click “Add Employee” in the People panel.
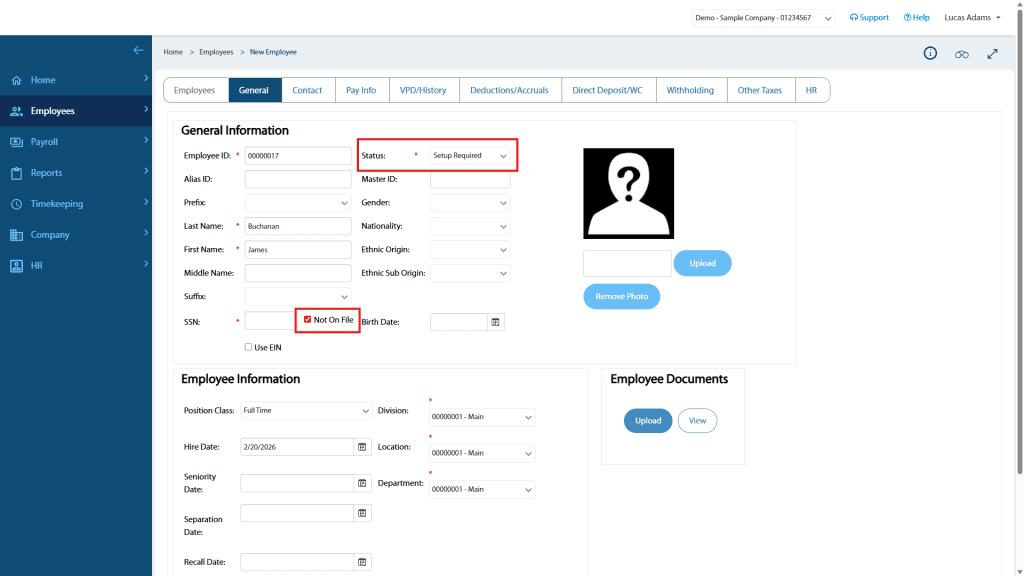
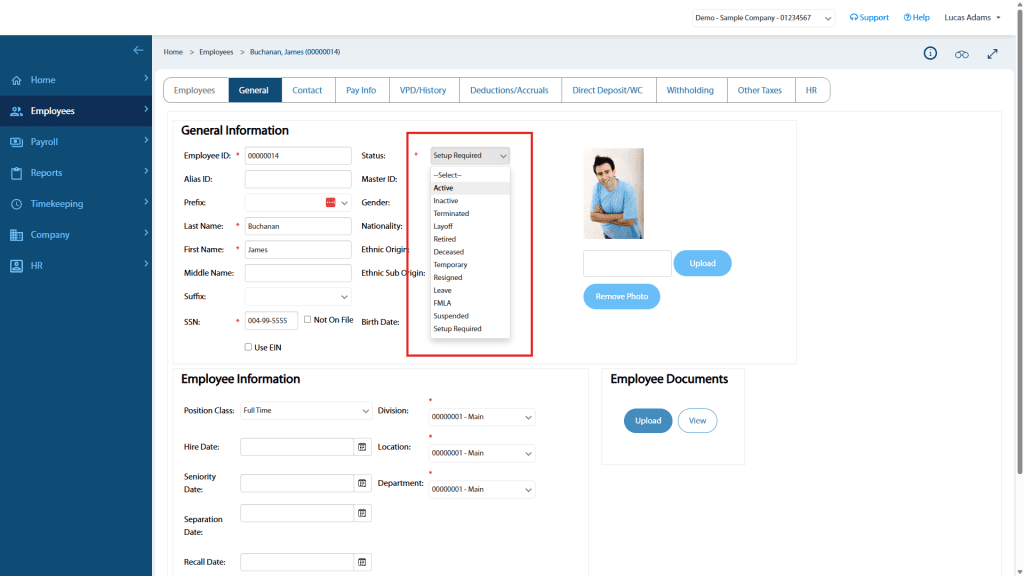
- Setup Required – Change the employee’s status to “Setup Required.”
- Not On File – Mark the SSN as “Not On File.”
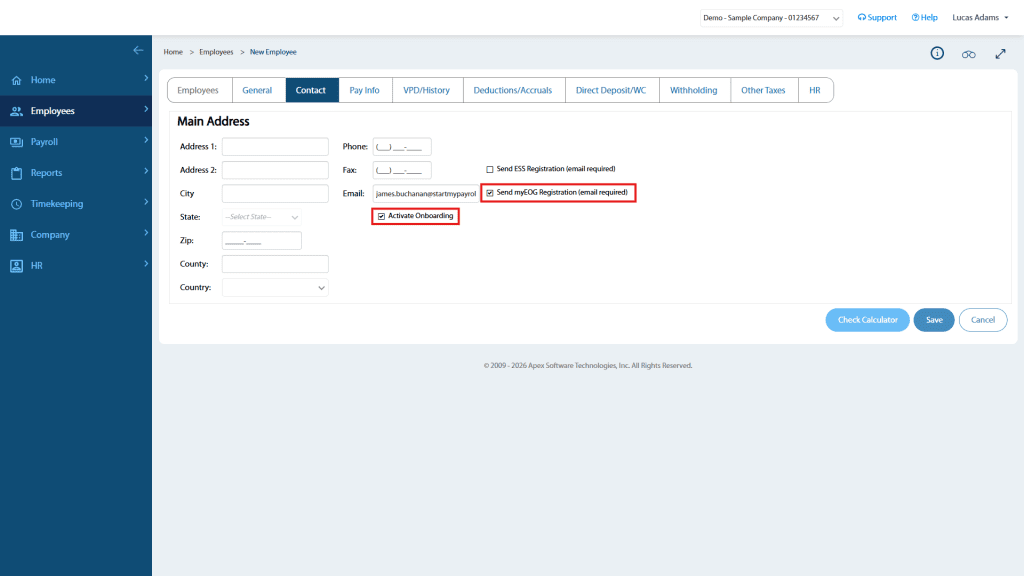
- Email Address – On the Contact tab, add the employee’s Email Address.
- Activate Onboarding – Check “Activate Onboarding” AND “Send myEOG Registration.”
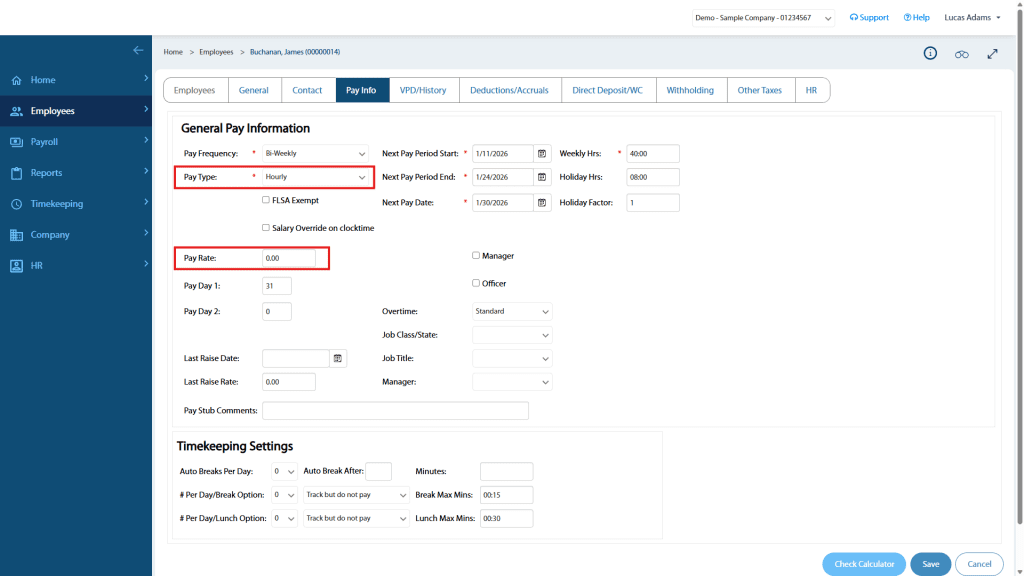
- Pay Info – On the Pay Info tab, set the “Pay Type” and “Pay Rate.”
- Deductions – Check and set Deductions and Accruals as needed.
- Workers’ Comp – Set the “Single Job Class” field if you have an active Workers’ Comp policy.
- Tax Group – On the Withholding tab, set the “Tax Group”.
- Occ Code – Employers in SC, WA set the “Occupational Code” on the Withholding tab.
- Save – Scroll to the bottom of the page and click “Save.”
- Activate Employee – After notification that employee completed onboarding, from your Employer Dashboard, click “Employee Setup Required” in the People panel. Select employee and click “Edit.” Change the employee’s status from “Setup Required” to “Active” and Save.
In this tutorial, you’ll find a Quick Guide for a helpful refresher as well as detailed, step-by-step instructions with screenshots designed to help you quickly and confidently add a new employee in payroll.
For more advanced setup options, contact your Payroll Account Manager for assistance.
View the employee experience in the Employee Onboarding Guide: Step-by-Step Instructions.
Step 1 – Add Employee
From your Employer Dashboard, click Add Employee in the People panel.
Step 2 – General Information
- Important: Change the employee’s status to “Setup Required” as shown below.
- The system automatically assigns the next available Employee ID. You may change this if you follow a specific numbering pattern.
- Required fields are marked with a red asterisk (*). Complete all required fields.
- If you do not have the employee’s Social Security Number, check “Not On File.” The employee will provide it during onboarding.
Step 3 – Contact Information
Navigate to the Contact tab.
- The employee will enter their primary address during onboarding.
- Enter the employee’s email address carefully.
- If using a personal email (Gmail, Yahoo, etc.), verify accuracy.
- If using a company email, ensure the employee already has access to it.
- Check the boxes:
- Activate Onboarding
- Send myEOG Registration
Step 4 – Pay Information
Navigate to the Pay Info tab.
The following fields will auto-populate based on your primary pay cycle:
- Pay Frequency
- Period Start/End
- Pay Date
- Pay Day(s)
- Weekly Hours
Set the Pay Type and Pay Rate
- Hourly – Enter the hourly rate in the Pay Rate field.
- Salary – Enter the per-pay-period salary amount (not annual salary) in the Pay Rate field. Most salaried employees are FLSA Exempt; check the box if applicable.
- Commission – Typically entered with a $0 Pay Rate. Commission amounts are added during payroll processing.
- Contract – Classifies the individual as a 1099 Independent Contractor. Typically entered with a $0 Pay Rate. We strongly recommend consulting your Payroll Account Manager before selecting this option.
Step 5 – Deductions and Accruals
Navigate to the Deductions/Accruals tab.
- Company default deductions and accrual policies will automatically apply.
- Additional available deductions and accrual policies can be added manually.
- Review and adjust contribution amounts as needed.
For detailed instructions, see the Deductions and Accruals tutorial.
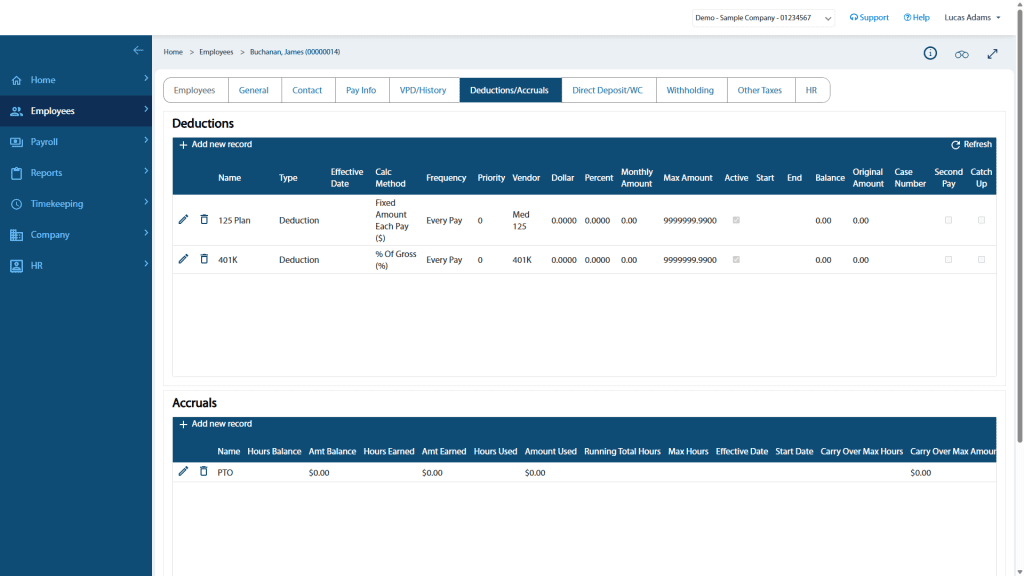
Step 6 – Direct Deposit & Workers’ Compensation
Navigate to the Direct Deposit/WC tab.
Direct Deposit
Employees will complete this section during onboarding. This applies only if you offer Direct Deposit.
- If Direct Deposit is required, the employee must complete this section to complete onboarding.
- If Direct Deposit is optional, the employee is allowed to skip this section to receive a physical, employer-printed paycheck.
- If you do not offer Direct Deposit at this time, this section is not visible to the employee during onboarding.
Workers’ Compensation
If you have an active Workers’ Compensation policy:
- You must assign it to the employee.
- Set the Single Job Class field to your provider’s name.
We partner with most major carriers to offer fully integrated Pay-As-You-Go Workers’ Compensation Insurance. Contact your Payroll Account Manager for more information.
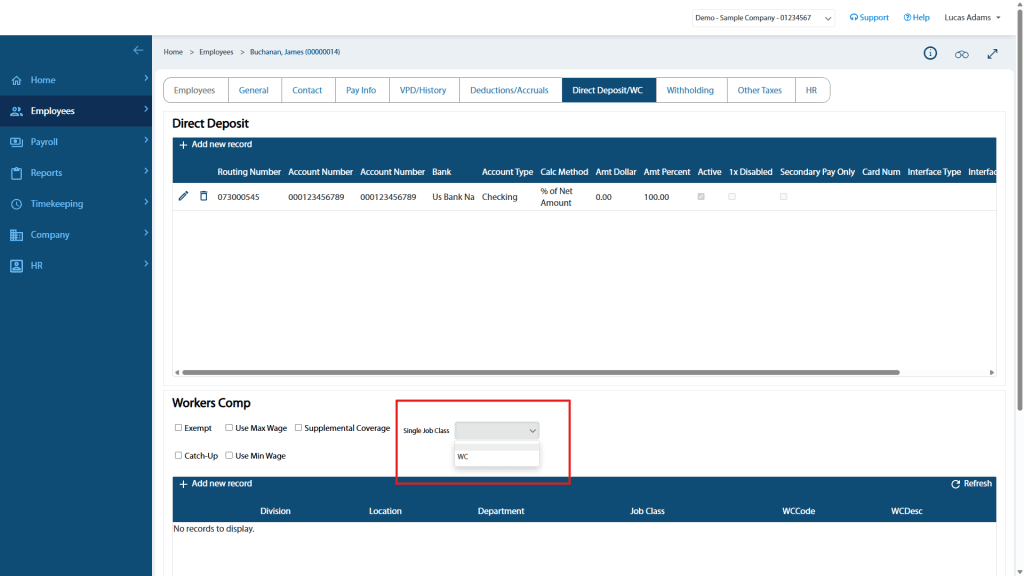
Step 7 – Withholding
Navigate to the Withholding tab.
Tax Group
Select the correct Tax Group.
- Most single-state employers will only have one option.
- Multi-state employers must select the correct state.
If the appropriate Tax Group is not available, stop and contact your Payroll Account Manager before proceeding.
Federal & State Withholding
Employees will complete this section during onboarding. They will:
- Fill and Sign Form W-4
- Fill and Sign a State Withholding Form (if applicable)
- Fill and Sign Form I-9, Employment Eligibility Verification
Documents are stored securely in the employee profile and can be viewed at any time.
Do you want employees to review and acknowledge additional Company Policy documents during onboarding?
We can make your job much easier by requiring new employees to review and sign Company Policy documents and more, automatically during the onboarding process.
With the Enhanced Plan, employees can:
- Sign Employee Handbooks
- Sign custom company policy documents
- Re-acknowledge policy documents annually
All documents are stored securely in the employee profile in your payroll plaform and available to employees to reference in their Employee Portal. Contact your Payroll Account Manager for details.
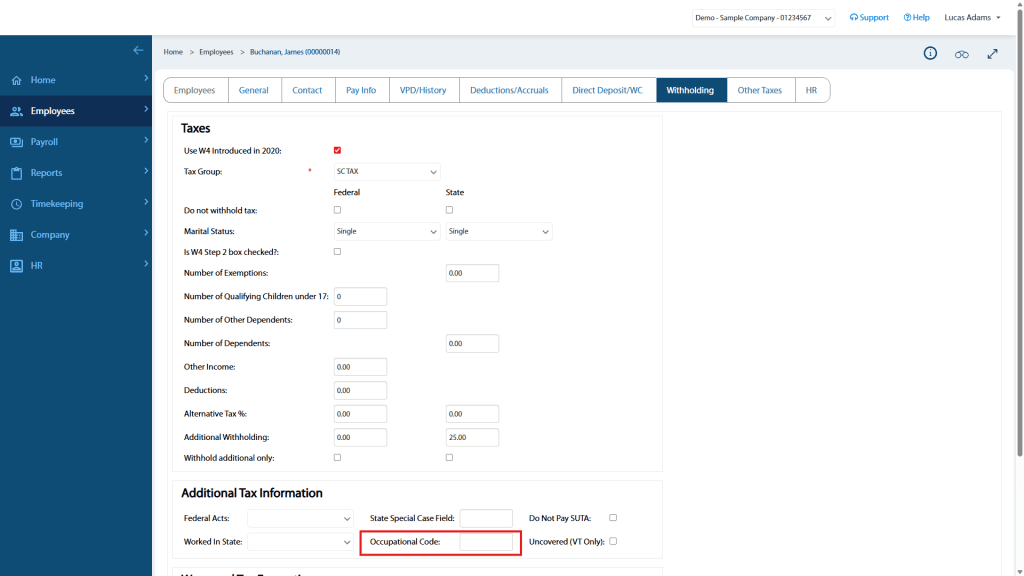
Occupational Codes (State-Specific Requirements)
Some states require SOC (Standard Occupational Classification) codes for unemployment reporting:
Washington (WA ESD)
- Enter first 6 digits only (no dash)
- Lookup Tool: https://www.onetcodeconnector.org/
South Carolina (SC DEW)
- Enter 6 digits with dash (example: 27-1501)
- Lookup Tool: https://dew.sc.gov/soc-occucoder
Step 8 – Save Employee
Scroll to the bottom of the page and click Save. You have now completed the initial employee setup.
Important: The employee must complete onboarding before you can change their status to Active and include them in payroll.
What Happens Next?
Within a few minutes, the employee will receive an email with onboarding instructions.
View the employee experience in the Employee Onboarding Guide: Step-by-Step Instructions.
Activating the Employee for Payroll
Once the employee completes onboarding:
- From the Dashboard, click Employee Setup Required in the People panel.
- Select the employee and click Edit.
- Change the status from Setup Required to Active.
- Click Save.
The employee is now active and ready to be included in payroll.
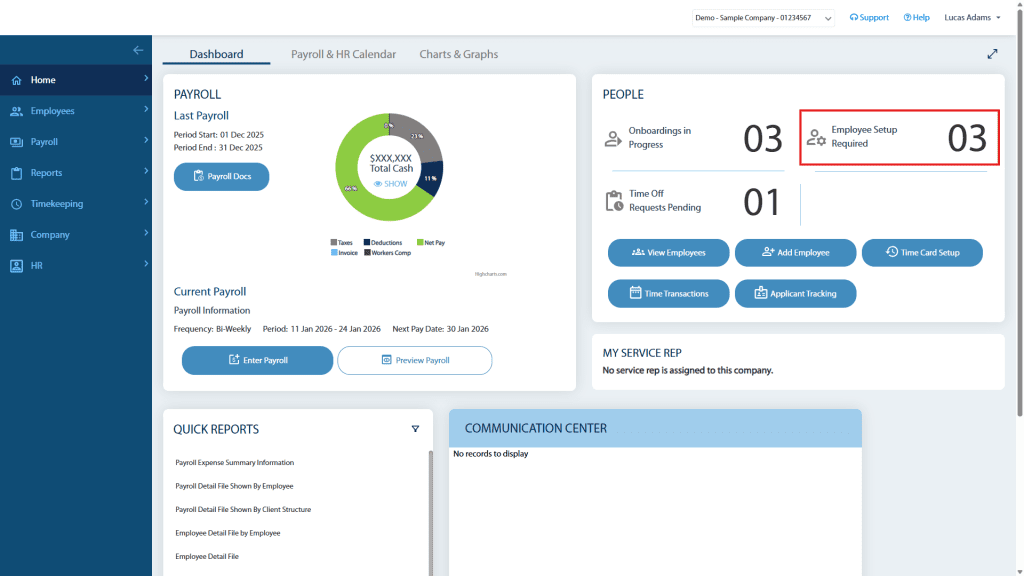
How Do I Know When an Employee Completed Onboarding?
When an employee completes onboarding:
- You will receive an email notification.
- You can also view notifications under Onboardings in Progress in the People panel.
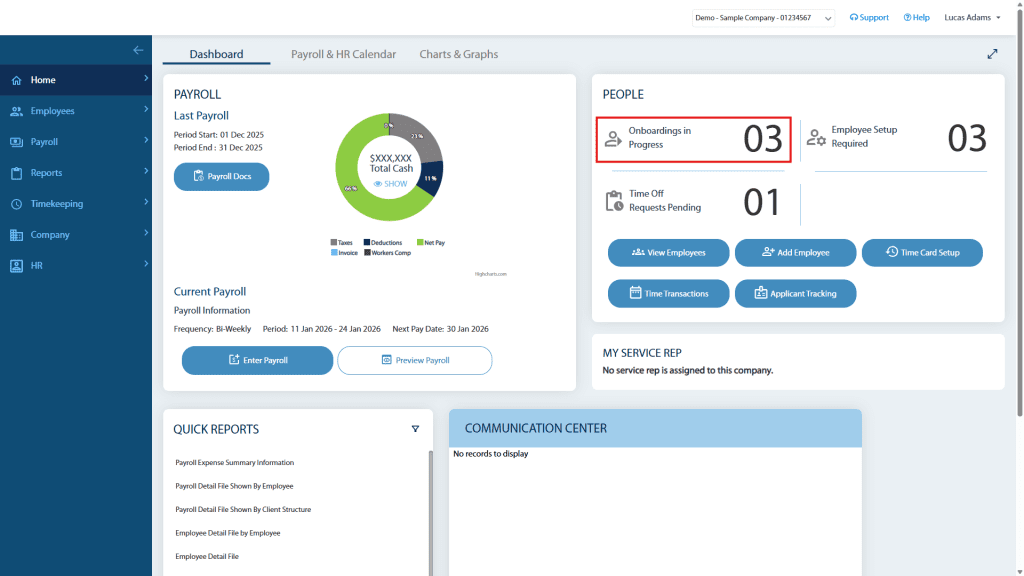
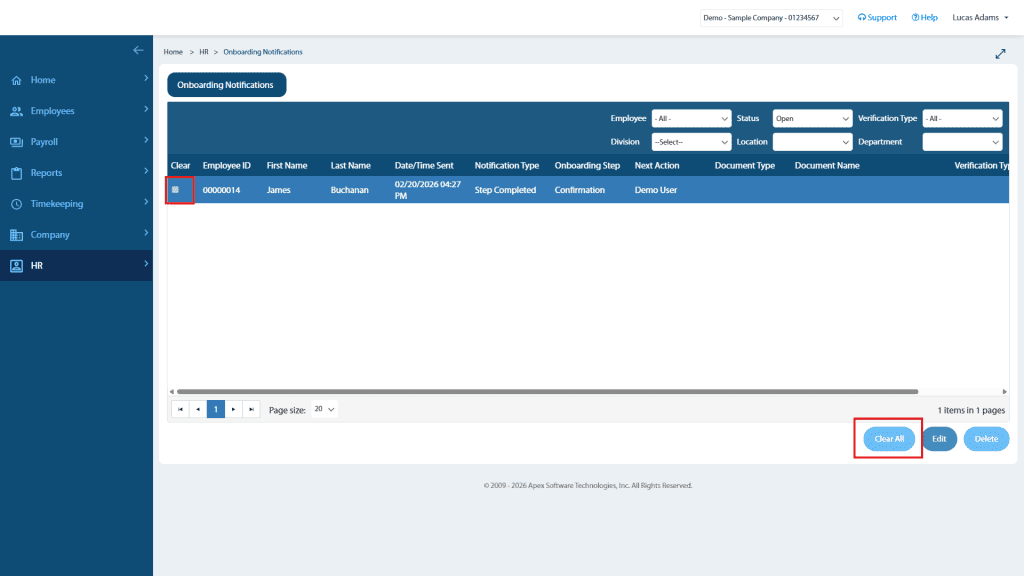
Employees who have completed the final step will appear as ready for activation.
You may clear notifications individually or click Clear All.
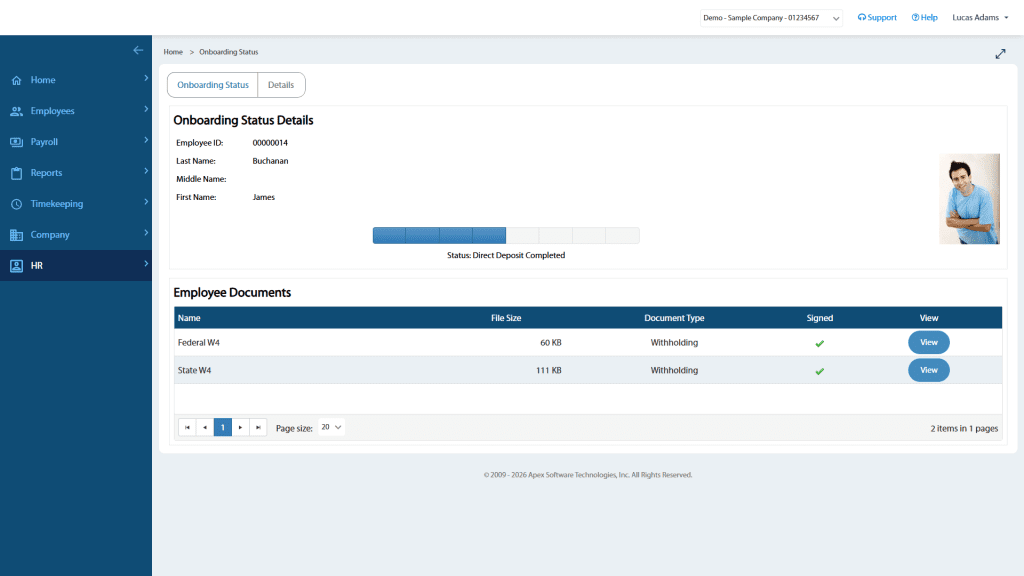
Monitor Onboarding Progress
To monitor onboarding progress: Navigate to HR > Onboarding > Onboarding Status
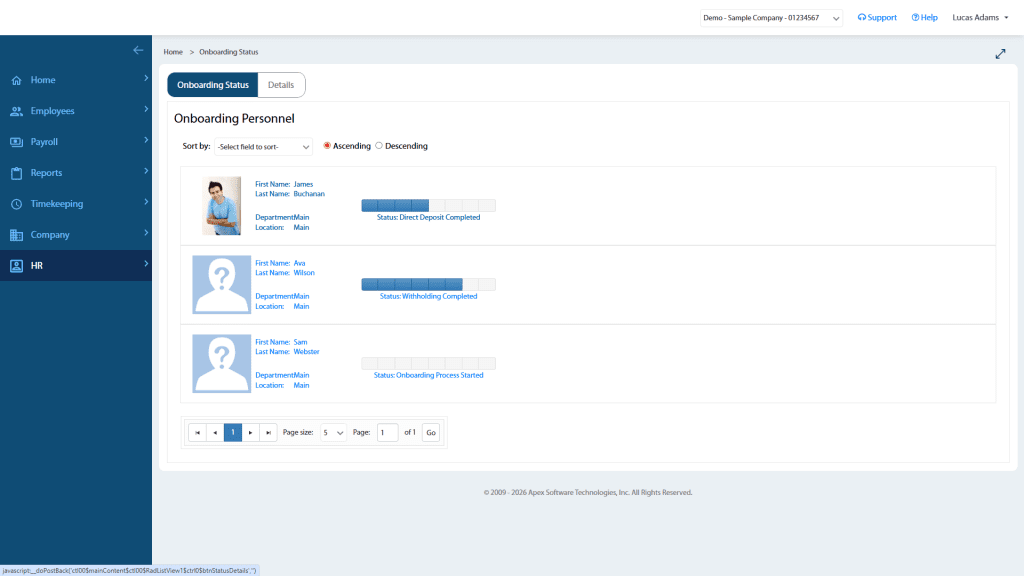
Click an employee’s name to view detailed progress and completed documents.
Conclusion
Using Employee Onboarding ensures accurate employee data collection, secure document management, and a smooth transition into payroll. Following this process allows you to quickly add new hires while maintaining compliance and consistency.
For additional setup options or questions, contact your Payroll Account Manager for assistance.